Katie Wood Clark
Interactive Designer | Production Coordinator


Development
Engine: CRYENGINE 3, Sandbox Editor
Game: Crysis 2: Maximum Edition
Game Mode: Single Player Combat Mission
Development Time: 6 Weeks
Responsibilities
-
Built the level structure with BSP and then with modular static meshes.
-
Catered toward various gameplay styles including ‘stealth’ and ‘run and gun.’
-
Decorated and lit the environment with a focus on environmental storytelling.
Downloads
Level Overview
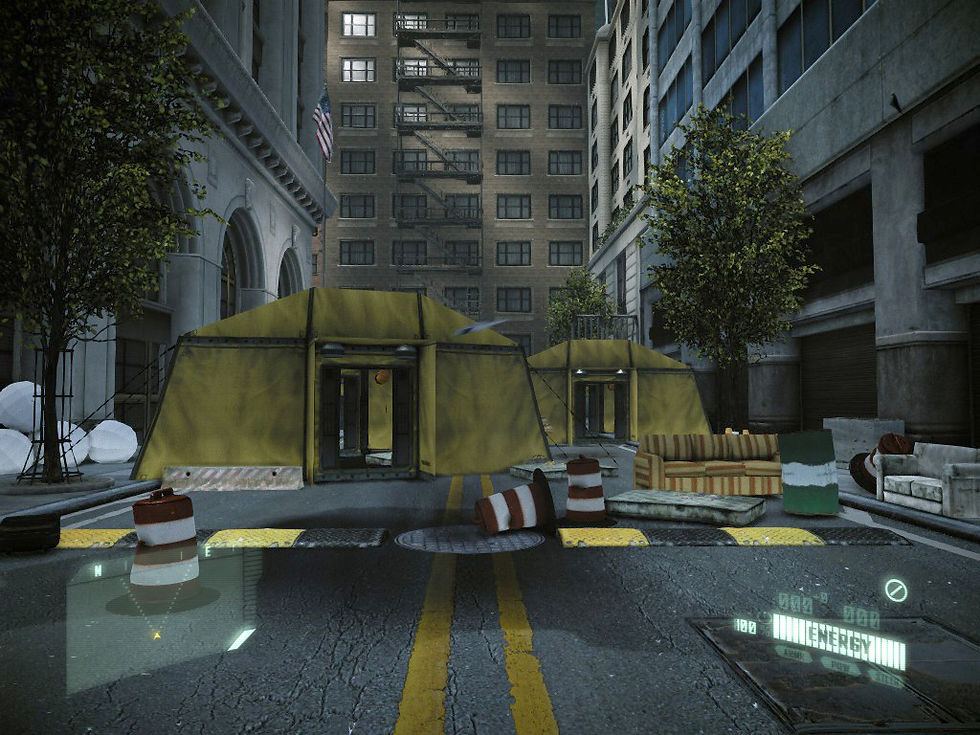
“Indiscriminate” is a Crysis 2: Maximum Edition single player level occurring within a post-apocalyptic New York City. At the outset of the level, players navigate through an EMAT decontamination settlement in search of the main facility. Throughout the course of “Indiscriminate,” there exist two central playstyle choices, including the cautious “Stealth” strategy or the aggressive “Run and Gun” strategy. The player employs these tactical options when encountering either the incorporated “C.E.L.L. Grunt: Short Range or the “C.E.L.L. Grunt: Marshall_Hammer” enemy types. Upon reaching the core objective point, the “Indiscriminate” level concludes.
Backstory
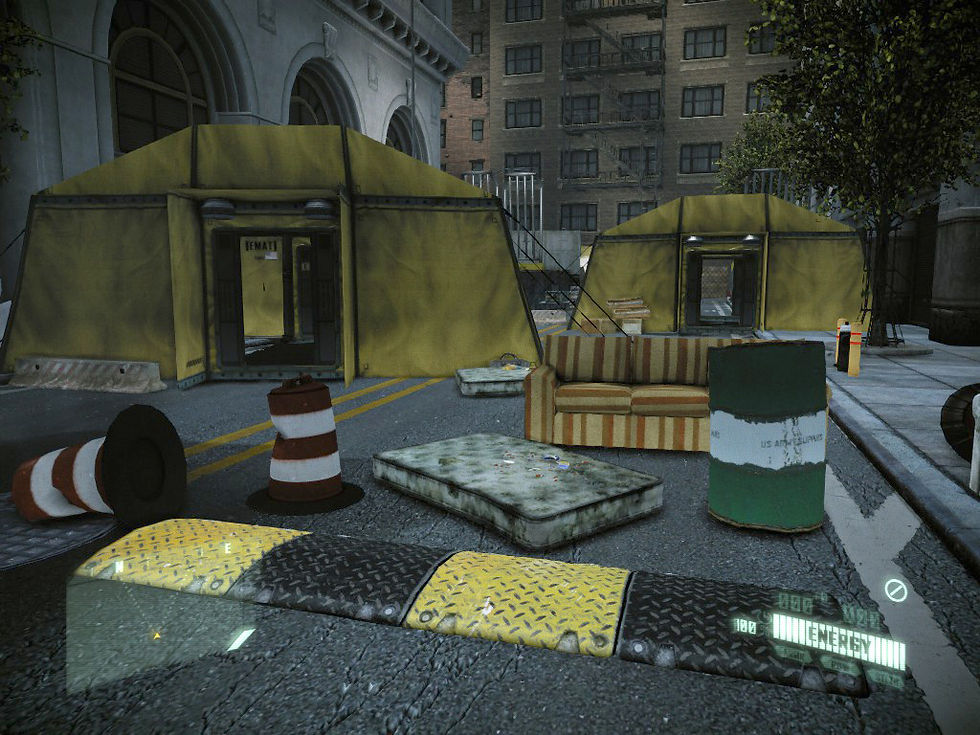
The recent outbreak of the Ceph manifested virus, “Manhattan” has caused panic amongst the citizens of New York City. In an effort to contain the outbreak, C.E.L.L. soldiers, contracted by the US government, begin moving civilians to quarantined areas. In these areas, the humans operate in homeless-style communities, sleeping on mattresses, distributing food, etc. However, the C.E.L.L. separate the infected individuals, housing them in the central EMAT decontamination tent. Once there, these sick civilians are subsequently evaluated and treated.
However, due to the rise in the number of infected, lack of resources, and increasing disorder, the C.E.L.L. soldiers decide to simply gather the remaining civilians, infected or not, and exterminate them. This extreme conclusion results in a persecution-fueled genocide in which any non-soldier dies. Alcatraz, the protagonist, hears word of these disgusting acts and decides to intervene. However, inside the compound, Alcatraz discovers that he may be too late.
Level Playthrough
Design Goals
Throughout development of the “Indiscriminate” level, I focused on specific elements. With these items addressed, I found success and positive playtester feedback.
The following list details the overall design goals:
-
Communicating an emotionally charged narrative through scene composition and item clutter.
-
Balancing and iterating on enemy positioning and enemy weaponry type.
-
Creating a unique, short combat experience despite working with limited game assets.
Maps and Walkthrough


Level Objectives
Overall Objective:
The “Indiscriminate” level contains a singular, core objective for the player to undertake and complete. This solitary goal allowed me to guide the player through other means, including lighting, environmental storytelling, enemy pathing, etc. However, the objective message does provide helpful information regarding the mission’s purpose and surrounding narrative.
-
Infiltrate the main C.E.L.L EMAT decontamination tent.
-
Failure: Death by C.E.L.L. Grunt: Feline
-
Failure: Death by C.E.L.L. Grunt: Marshall
-
Failure: Death by C.E.L.L. Grunt: Grendel
-
Area 1: Overview


Gameplay/Story
-
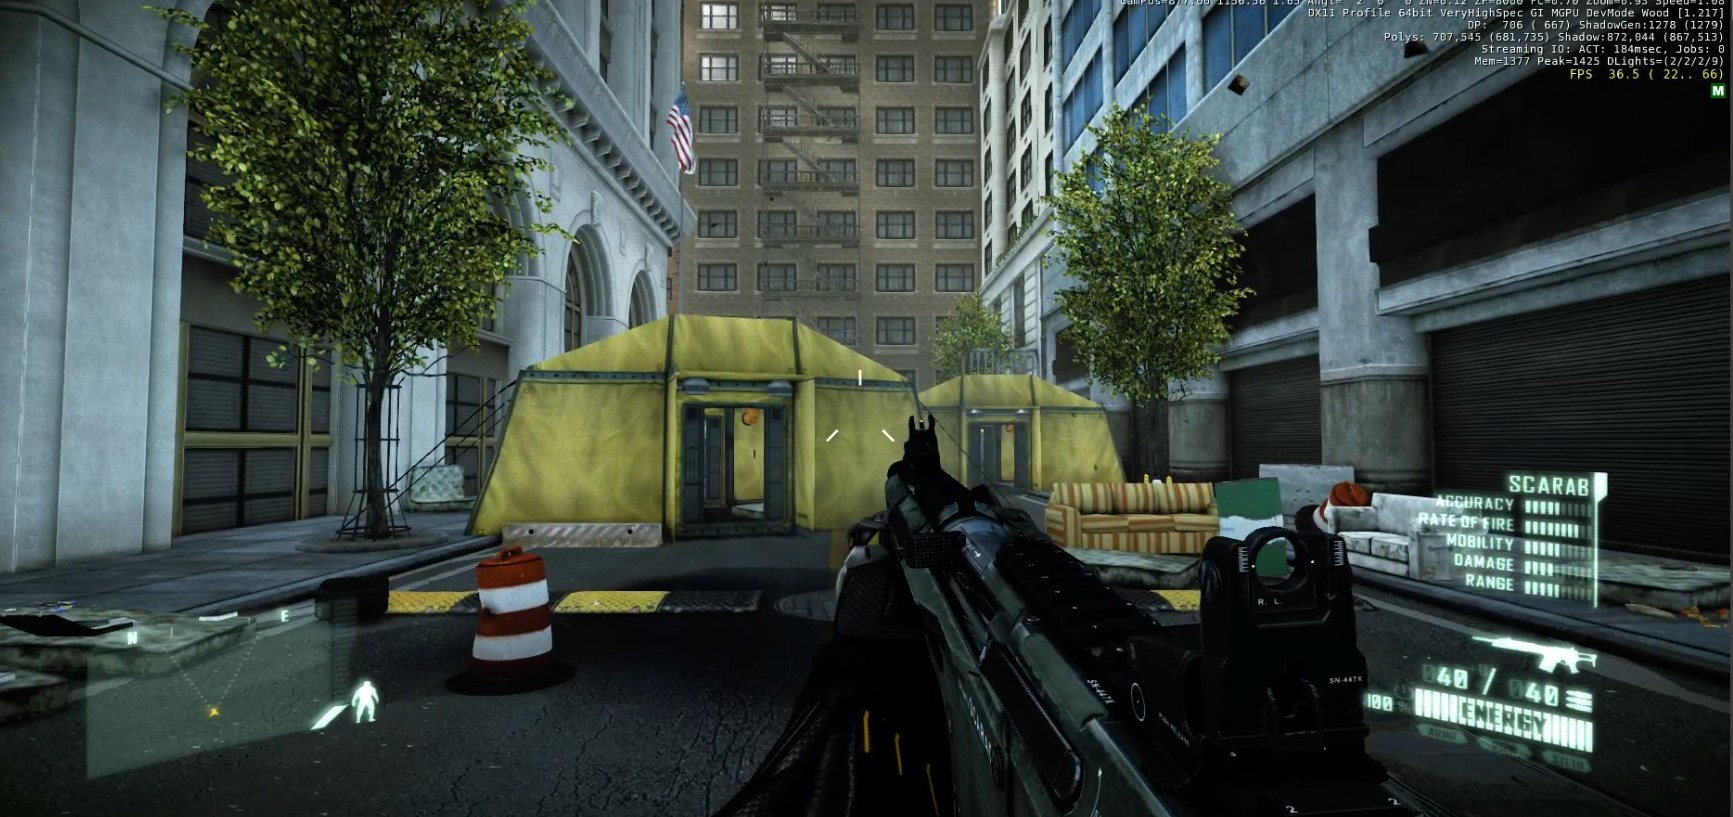
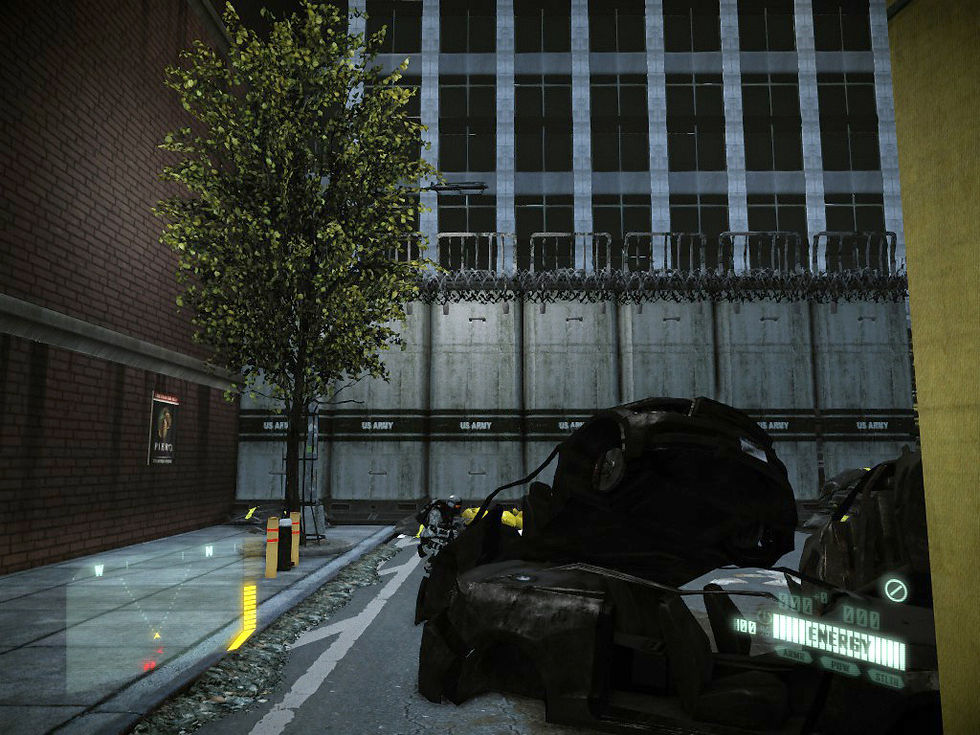
The player spawns immediately inside of a closed gate or C.E.L.L. barrier. Initially, the player does not encounter or engage in any combat. Instead, the player may explore the environment, whether that be inside of the EMAT tents or around the EMAT tents. The scene composition of these sections provides environmental narrative, informing the player of the mission’s context.
-
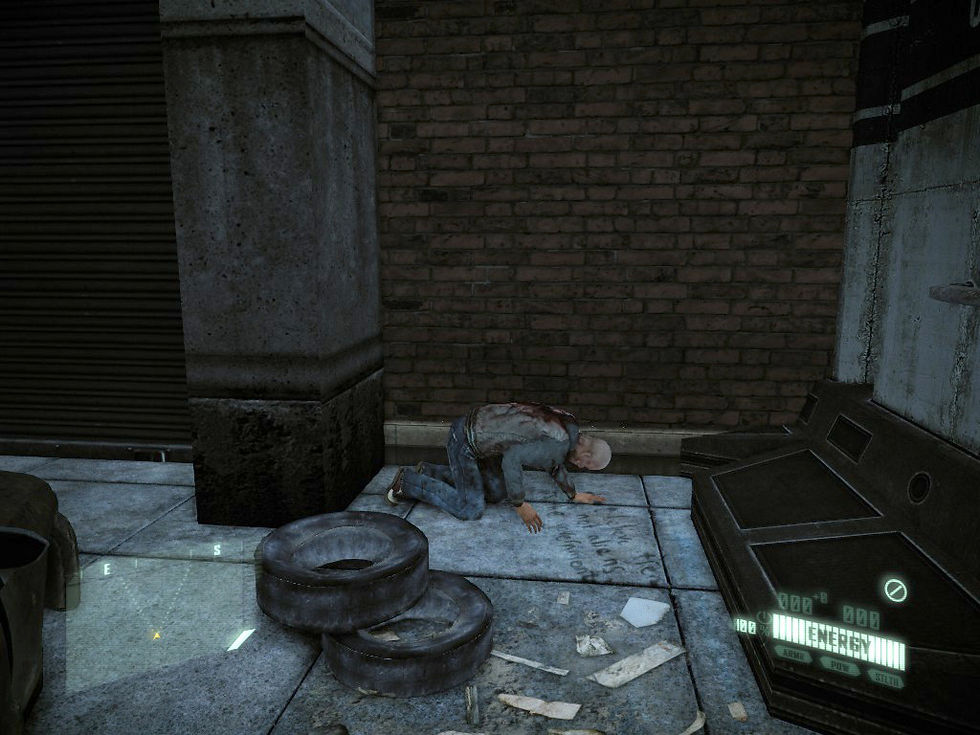
Once the player enters trigger 1, a scripted sequence occurs. The player witnesses a civilian fleeing from an unknown and unseen individual. As the player moves forward, they notice a C.E.L.L Feline soldier taking aim and shooting upon the unarmed civilian. Subsequently, the soldier approaches and inspects his victim. The player may hide behind nearby cover to remain hidden from this C.E.L.L. soldier.
-
Meanwhile, trigger 2 activates a second C.E.L.L. Feline soldier located within the section’s E2 tent. While patrolling, the soldier briefly emerges from either end of the decontamination tent. This action allows the player an opportunity to spot the second C.E.L.L. and react accordingly.
-
Regardless of the player’s preferred tactical option, the player proceeds through the area and enters Area 2.
Text
Objective Text
*Objective text prints when the player spawns into the game.
-
Objective: “Infiltrate the main C.E.L.L EMAT decontamination tent.”
Tactical Options
"Run and Gun" Tactic
When utilizing the “Run and Gun” tactic, the player charges forward, confronts the first C.E.L.L. soldier and continues charging into the next section.
"Stealth" Tactic
When utilizing the “Stealth” tactic, the player lies in wait behind the initial cover spots and then proceeds around the outside of the farthest EMAT tent.
Area 2: Overview
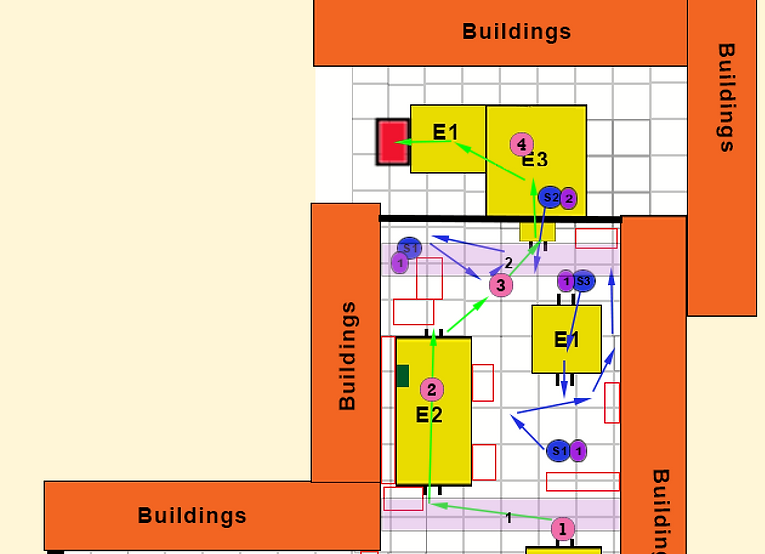


Gameplay/Story
-
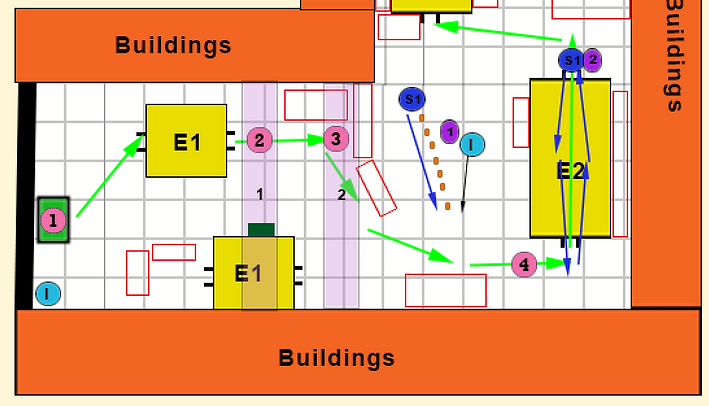
After exiting Area 1, the player immediately steps into the third level trigger. This trigger activates three C.E.L.L. soldiers, one of type Feline and the other of type Grendel. Consequently, the player encounters a secondary enemy type.
-
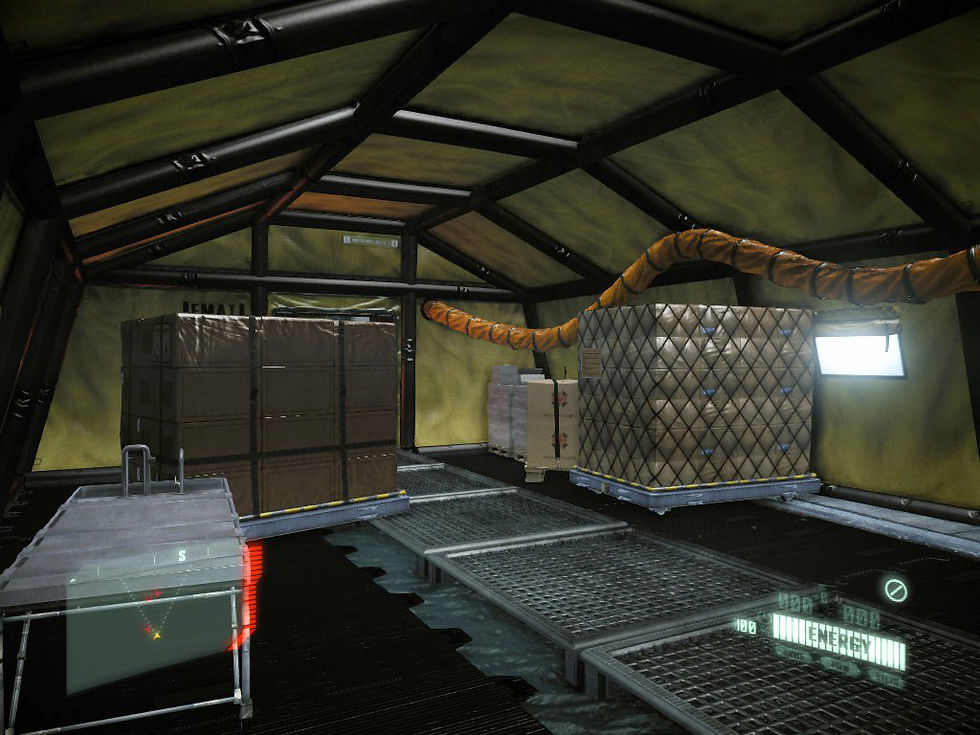
The player approaches the depicted E2 decontamination tent, collecting ammo if needed.
-
After avoiding or disposing of the three C.E.L.L. soldiers in this area, the player moves toward the E3 tent.
-
As they approach, they subsequently enter the fourth and final trigger of the level. This trigger activates a Marshall wielding C.E.L.L. soldier.
-
Regardless of the player’s preferred tactical option, the player kills the final C.E.L.L. soldier and proceeds into the E3 tent.
-
To conclude the mission, the player moves through the tent and enters the connecting E1 tent.
Tactical Options
"Run and Gun" Tactic
When utilizing the “Run and Gun” tactic, the player charges forward, past the three C.E.L.L. soldiers triggered by trigger 3. Subsequently, the player kills the Marshall wielding soldier, and proceeds to the game's exit.
"Stealth" Tactic
When utilizing the “Stealth” tactic, the player quietly moves through the nearby E2 tent, collecting ammo if necessary. Subsequently, the player briefly pauses behind a gathering of cars. As the closest soldier moves along his designated path, the player proceeds to cloak and stealth kill the soldier. Quickly cloaking again, the player can easily avoid the remaining soldier and enter the E3 tent. Once inside, the player enters the E1 tent and thereby completes the mission.
Scripting
Enemy Initialization and Shooting Sequence Setup
Enemy Triggering
In Cryengine 3, scripting is accomplished through the visual scripting program dubbed Flowgraph. Within Flowgraph, designers can access functions by way of specific nodes.
-
To trigger enemy waves, firstly create an AreaShape.
-
Find the AreaTrigger Entity: Rollup Bar -> Entity -> Triggers. Place it into the level.
-
Select the previously created AreaShape and "pick" the AreaTrigger entity with the PICK function.
-
Now, create an AITerritory. These entities can be edited like AreaShapes and should exist around an area where the enemies navigate.
-
Next, pull in an AIWave Entity: Rollup Bar -> Entity -> AIWave. Place it into the level.
-
Link the AIWave entity to the AITerritory.
-
Subsequently, assign the desired enemy to the AITerritory.
-
Now, select the original trigger and scroll to the Flowgraph section in the Rollup Bar.
-
Click the Create button. Consequently, an empty Flowgraph opens.
-
Right click inside the blank space and select "Add Selected Actor." A node referencing the AreaTrigger appears.
-
Select the AIWave in the level and create another "Selected Actor" node.
-
Select the AITerritory in the level and create a third "Selected Actor" node.
-
Create a TimeDelay node and drag connections between the AreaTrigger reference, the AITerritory Reference, and the AIWave reference. This action instantiates the enemy in this wave making it bound to the specified territory.
-
Once the enemies exist in the level, they need to know their desired location or behavior. Right click and scroll to the 'Logic' tab. Select the 'Any' node.
-
Right click again and go to the 'AI' tab. Select the 'GoToEx' node.
-
After dragging tag point entities into the level, add references to them inside of the Flowgraph.
-
Connect the 'Logic:Any' node to the various 'AI:GoToEx' nodes. Connect the tagpoint entities to tell the enemy which position/tagpoint to go to next.
-
If desired, scroll to the 'AI' tab and create an 'Anim' node. This forces the enemy to play a certain animation at the end of their walk sequence.

Triggering a C.E.L.L. Attack on an Entity
When designing the "Indiscriminate" level, I included a specific scripted sequence of a C.E.L.L. soldier shooting an armed civilian.
-
To achieve this desired interaction, create an AreaShape.
-
Find the AreaTrigger Entity: Rollup Bar -> Entity -> Triggers. Place it into the level.
-
Select the previously created area shape and "pick" the AreaTrigger entity with the PICK function.
-
Now, select the trigger and scroll to the Flowgraph section in the Rollup Bar.
-
Click the Create button. Consequently, an empty Flowgraph opens.
-
Right click inside the blank space and select "Add Selected Actor." A node referencing the AreaTrigger appears.
-
Right click again and scroll to the 'AI' tab. Select the 'ShootAt' node. In this node's details, select the enemy.
-
Place a dead body entity into the level.
-
Select the dead body entity and return to the Flowgraph.
-
Right click and scroll to the 'Entity' tab. Select the 'EntityId' node.
-
Right click and scroll to the 'Entity' tab. Select the 'EntityPos' node. In this node's details, select the dead body entity.
-
Link the 'EntityId' node and the 'EntityPos' node to the 'ShootAt' node. This action informs the specified soldier to shoot at or near the specifed target and target's position.

Postmortem
What Went Well:
-
During the course of development, I found success with the environmental storytelling aspect of the project.
-
With playtesting, I discovered that most of my original design worked well for a short combat experience and required little to no modification.
-
Balancing and timing the triggered enemy encounters proved easily adjustable.
-
The scope of the project proved appropriate for the alloted time period and schedule.
What Went Wrong:
-
Despite the useful pre-set building assets, the building assets were poorly named and highly difficult to utilize in the world. Many buildings were meant for certain perspectives and thus restricted reuse and variation.
-
The A.I./enemy system was very chaotic and uncooperative. Despite my intentions, the C.E.L.L. soliders acted in unexpected ways. Resetting the A.I., did little to solve the issues and instead I merely had to mitigate the problems.
What I Learned:
-
Due to the restrictions of the Crysis 2 assets, I had to discover creative ways to address issues and clutter the environment.
-
In a short amount of time, I learned the intricacies, particularly involving world-building and scripting, in an unfamilair engine.